I love natural nails. In fact, you can find me rocking natural nails more than done-up nails. It’s just easier. But you know what else is also easy? Press-ons! If you want something more elevated and don’t want to hassle with chipped polishes or drying time. Press-ons are the next best alternative!
I have small nail beds, so it took me some time to find the right brands that provide press-ons that fit my nail beds. Below, I share my 4 favorite press-on nails for small nail beds.
This post is all about press-on nails for small nail beds.
Don’t get me wrong. Although I love natural nails, I used to be that girl who got her nails done consistently at the salon. I was younger then. This meant I had more time and money to spend on things like that.
Now that I’m older, thinking about spending hours at the nail salon doesn’t appeal to me anymore. Plus, the cost has definitely gone up since I was in my 20’s. I used to get an acrylic French nail set for $25-35! Now, I heard they can range from up to $200 or more. And this is something you need to maintain or fill every 4 weeks or so.
That’s why I love press-ons so much! The time to do your nails is much quicker, and the cost is also more affordable. Although they may not last as long as getting your nails done. This is fine for me because I tend to get sick of my nails quickly and love that I can change them in 2 weeks easily.
Below, I list my 4 favorite press-on nails for small nail beds in ranking order. Number 1 is my favorite out of the four, and so on.
1. The Only Nails
This is my favorite because they are a bit more decorated and thicker than the average press-on nails. It is higher in price point versus other press-ons, at around $35. But as I said, it provides more designs and the press-ons are better quality.
Most press-ons are a lot thinner and tend to alter their shape after the first week of wear. However, with The Only Nails, I noticed the tips of these nails were able to maintain their shape after two weeks, which I thought was impressive.
The only thing about The Only Nails press-ons is they don’t provide extra press-on nails like the rest that I mention below do. They provide only 10 tips. So you will need to measure your nail bed and order based on their size guide.
I’m a size small and noticed the thumb was a tiny bit too small. That didn’t bother me too much because the quality made up for it.
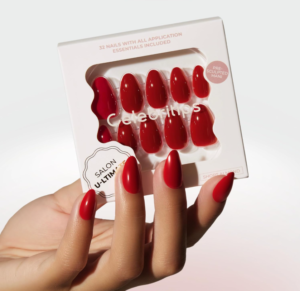
2. Celebritips
This is my next favorite. Unlike The Only Nails, they provide a range of tip sizes. The reason this is part of my top 4 is that the quality, although not as thick as The Only Nails, is pretty good as an affordable option. They are always having discounts too.
The color selections are pretty, but they lack designs. I found Celebritips provides great options for press-on nails for small nail beds. They also provide several options in length and shapes. The styles and colors are super feminine and help make your fingers look dainty and feminine. I like the curvature of the press-ons.
Another plus about this brand is that they offer a UV gel glue that is supposed to make your press-ons last a month. I haven’t tried it yet, so I can’t vouch for the longevity of them. You could probably use their UV gel glue for other brands too.

3. Static Nails
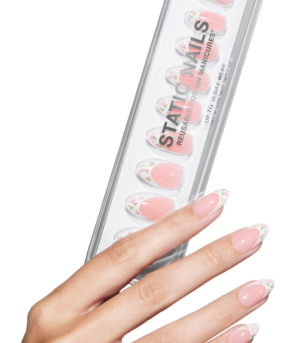
Static Nails would be my next favorite. I used to love Static Nails because of their nail polishes and decided to try their press-ons. I thought they were my favorite until I tried Celebritips.
Static Nails also offers multiple press-on tips in different sizes. So you are sure to find your match. However, I noticed they offer bigger sizes versus smaller tips.
I also prefer how Celebritips lay on my nails more because they curve in better. Whereas Static Nails are a bit flatter when pressed on. Static Nails also usually have discount codes as well.
4. Nail Reformation
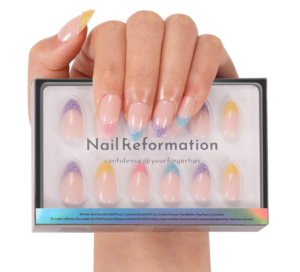
I feel like Nail Reformation and Static Nails are about the same quality. A tiny bit thinner than Celebritips. I have only purchased Nail Reformation from TJ Maxx. I know you can get them from Amazon too.
These press-ons are my least favorite when compared to the ones I mentioned above. But they are part of my top four because they offer press-on nails for small nail beds.
With all of these press-ons, I noticed I still need to file them a bit to smooth any rough edges. With Nail Reformation, I feel like I need to file it a bit more than with the others.
Nail Reformation also gives extra press-on tips for you to choose from.
Press-On Tips
When purchasing online, always look for discount codes first because there surely should be something out there. Also, check out your local TJ Maxx. That’s how my journey began. I found a bunch of press-ons there. That’s how I was able to test out different brands.
For bigger nail beds, I would recommend checking out Glamnetics. I’ve tried Glamnetics and noticed the press-ons offered were too big for me. Plus, Glamnetics also offers cute designs. I would say Glamnetics and Nail Reformation are very similar in design and quality.
How to Apply Press-On Nails for Small Nail Beds
- Find the press-ons that fit your nails first before applying. Have each press-on for each hand laid out.
- Buff and file your nails. You want to create a rough nail bed so your glue can stick better
- Wash your hands. This will allow all the debris created from filing to be removed, providing a clean surface
- Wipe your nail beds with alcohol. I will usually take a cotton pad and add alcohol, then wipe my nail beds.
- Make sure the alcohol is dry and do not touch it. You don’t want any oils from your skin on your nail beds.
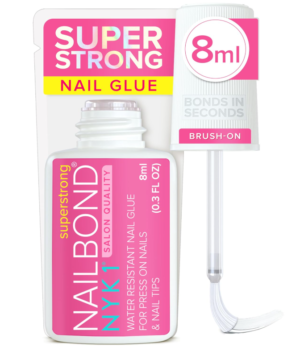
- Add nail glue to your nail bed and press-ons. I use a nail glue with a brush because it makes the process so much easier. Be sure to apply thin layers of glue to both your nail bed and press-ons. A thin layer, because when you press your press-ons on, the glue will spread and can leak out onto your fingers and cuticles. I also try to avoid adding glue near my cuticles or near the edges of the press-ons.
- Press your press-ons for at least 15 seconds. I will clip a plastic chip bag on the nail I just pressed on and leave it on while working on the next nail.
- Do one nail at a time. This means add the glue and then press one at a time. So glue and press. Do not glue all the press-ons and the nail beds at once, then press. This will dry out your glue.
I’ve tried so many different ways and have found the steps above have helped my press-ons stay on for two weeks! Sometimes I get a nail that pops off, but that’s because I’m usually pretty rough with my hands. I always have nail glue with me. And it has helped me not just with my press-ons but for so many other things as well.
I hope you find this blog helpful! And good luck and have fun with your nails!
Shop This Post